The reverse fold is quite useful, especially to make animals (neck, beak, nose and so on). The following series is a good exercise to practice to fold. A bird will appear at the end of it.

Fold a square sheet of paper along one diagonal. Re-open the piece of paper.
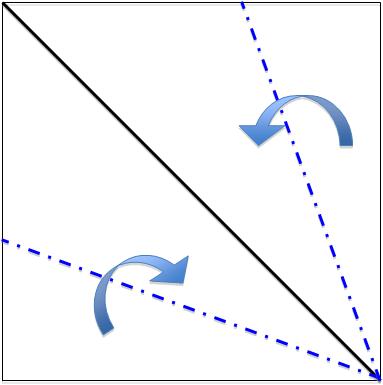

The square is now marked along a diagonal, which runs through 2 corners. Fold the 2 other corners towards the marked diagonal, following the 2 dotted blue lines. You should obtain a diamond with the 2 top sides smaller than the 2 bottom ones.
Fold the diamond inwards, following the initial diagonal (the diagonal slightly thicker on the drawing above). Thus, you obtain a triangle and the 2 corners you've just folded (grey on the drawing) disappear.


Now, it is time for the first reverse fold. Place the triangle you've just made in front of you, with the long side up. Fold the sharper angle upwards, following the blue dotted line, first in front of the un-moved paper part and then behind it. Mark this fold well, using your thumb nail.
Memorise the overall shape you get by folding either way and re-open the fold.
You should now push the paper upright, on either side of the un-moved paper part, using the mark you've just made, remembering the overall shape I ask you to memorise. This is an outside reverse fold.


Try it again, with the tip. Fold it towards the left, along the blue dotted line. First in front, then behind. Re-open it and push the tip on either side. The bird head just appeared.

Both reverse fold made here are outside reverse fold, meaning that the paper part to push sets on either side of the rest of the shape. There is also an inside reverse fold when the paper is push inwards, slightly disappearing inside the rest of the shape.
No comments:
Post a Comment